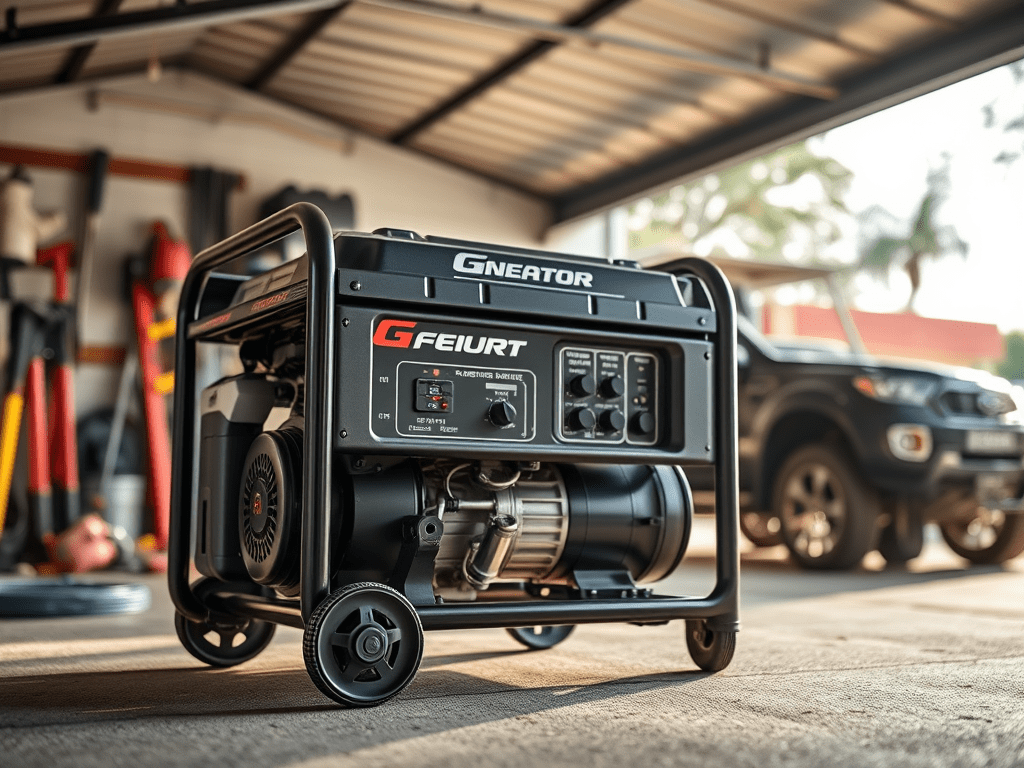
6,000 Watt Craftsman Generator Instructions: This covers most of the important steps, but other procedures regarding troubleshooting and periodic maintenance can be found within the Craftsman operator’s manual ( https://www.craftsman.com )
From this point onward, we all need to try to get cheap tents that are small enough for 1 person per person in our households. These should can easily be assembled indoors if we have a wide-enough rug underneath them within which clamps will pierce ( as opposed to the earth’s surface ). Also keep cheap sleeping bags and plenty of ” Crisco candles ( https://www.youtube.com/watch?v=Y1TiVg84ALU ) ” in our homes and apartments, even if we have generators. Placing several such candles into a bathtub and blocking a bathroom door’s bottom ( top half left alone to allow fumes to permeate outward ) could have saved the people that perished in freezing weather out in Texas. Situating a coffee pot or other cannister containing water would create a safe, radiant source of heat as well. With enough bottled water and snacks that can be opened easily, that’s a least a week’s worth of survival in frigid temperatures. In addition to this, here are some rudimentary instructions for cranking a 6,000 W ( 7,500 W startup surge ) Craftsman generator:
*** Prior to beginning, be sure to fill gas compartment with unleaded gas ( minimum of 87 octane ) with no more than 10% ethanol content. Be sure not to over-fill; the tank has a fuel-limit mark. ***
*** Do not overfilled with oil, and do not mix oil with gasoline. The oil cap is also a dipstick. Check oil level by dipping the oil cap as far as it will go into the oil compartment WITHOUT being twisted shut. ***
( 1 ) Be sure that electric cords that will be plugged directly into the unit are initially unplugged for safety reasons.
( 2 ) Be sure that the appliances that will be connected inside to the opposite end of electrical cords are initially unplugged and turned off for safety concerns.
( 3 ) Turn the circuit breaker switch on the generator to the ” on ” setting, which is a labeled to look like ( I ).
( 4 ) Flip the engine switch to the ” on ” setting ( I ).
( 5 ) Turn the fuel valve 90 degrees downward to the ” on ” setting ( I ). The valve can be twisted upward either to the right or left until it’s in a horizontal position to be turned to the off ( o ) setting.
( 6 ) When the ” choke lever ” is off, it will be positioned as far-right as it can turn. In order to crank the generator, it must be moved as far-left as it can be rotated into the ” start position “.
( 7 ) Slowly pull the starter cord until tension is felt, then pull it with the same motion used to crank a saw or lawnmower.
( 8 ) Move the choke lever into the ” run ” position by positioning it to point outward. This position is located at the halfway point between the off and start positions.
( 9 ) Allow generator to run at least 2 minutes to 5 minutes to stabilize.
( 10 ) Begin connecting outside cords to the generator.
( 11 ) On the inside, plug the appliance that will use the most power ( typically the refrigerator ) into its designated outlet, then turn it on.
Note: Turning the refrigerator off may not be a required step. Check with an electrician or someone in the generator company’s customer service department for answers.
( 12 ) Let it run for 2 minutes to 5 minutes to stabilize the current flowing from the generator.
( 13 ) Repeat steps to connect remaining appliances.
( 14 ) Use reverse procedure to disconnect appliances.
( 15 ) *** For space heaters, be sure to those compatible with the generator’s wiring to avoid starting a fire. ***
( 16 ) Generator cannot be positioned directly into wet weather, and it’s carbon monoxide sensor will cause it to shut off if it is located within a space that is too confined.
( 17 ) Generator will also turn off if it is not on a flat surface ( something to due with fluid-level sensors ).
( 18 ) Other maintenance and troubleshooting steps are noted in the operating manual.
Safety 1rst!!!
X
